DIY Pokemon Water Fountain
How To Make A Pokemon Water Fountain DIY Tutorial
Dive into the world of creative DIY with our latest project – a 3D printed Pokemon water fountain! In this blog post, we take you step-by-step through the process of transforming the classic Pokemon Blastoise into a stunning and functional water feature. Perfect for both Pokemon fans and DIY enthusiasts, this guide covers everything from 3D printing intricacies to waterproofing techniques.
Pokemon Water Fountain Design
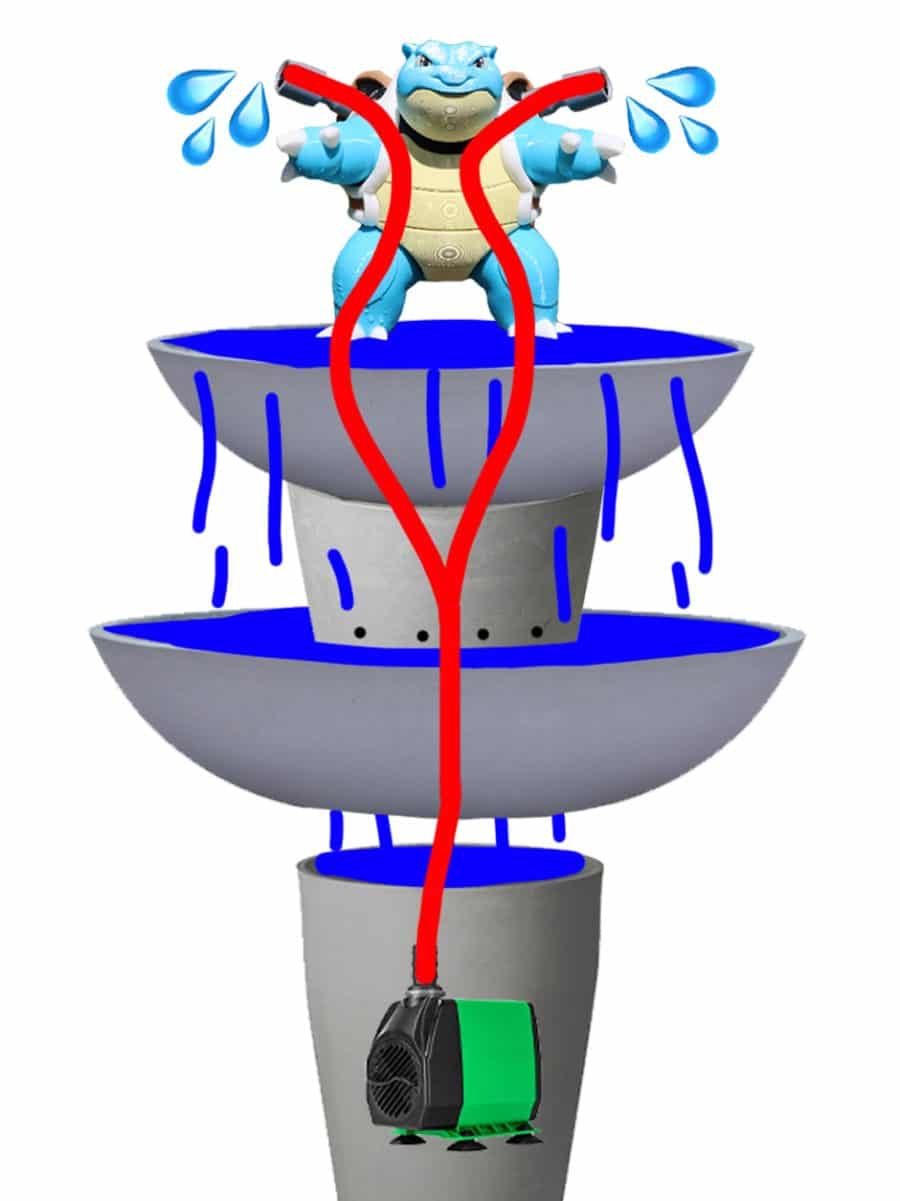
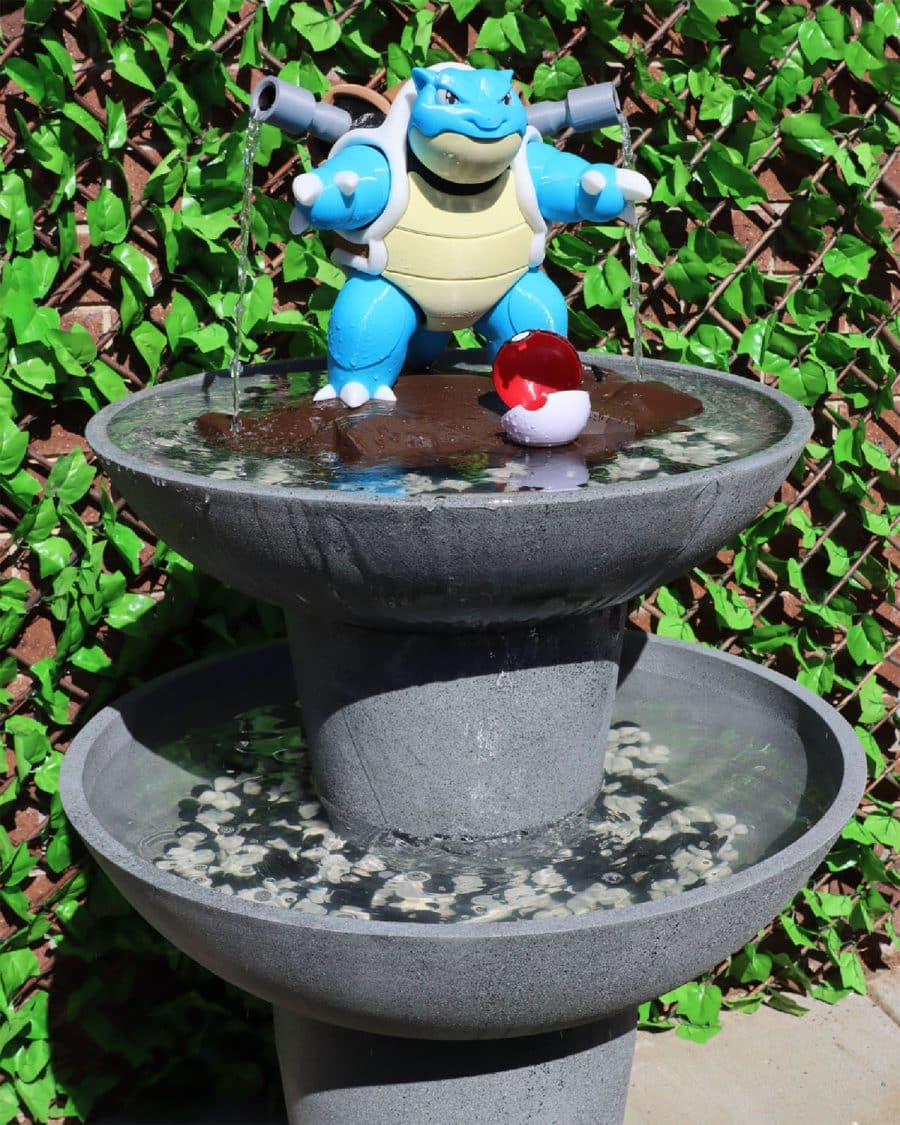
I adapted this design from various quick DIY concepts found online. For this project, I selected Blastoise as the ideal Pokemon, featuring water jets streaming from its cannons. Once the upper bowl reaches its capacity, the water cascades into a lower bowl. From there, it gently pours into a shorter central pot and eventually settles into the elongated bottom pot, which houses the pump. This system circulates the water back up to Blastoise, with all the tubing discreetly concealed within the fountain’s structure.
DIY Supplies
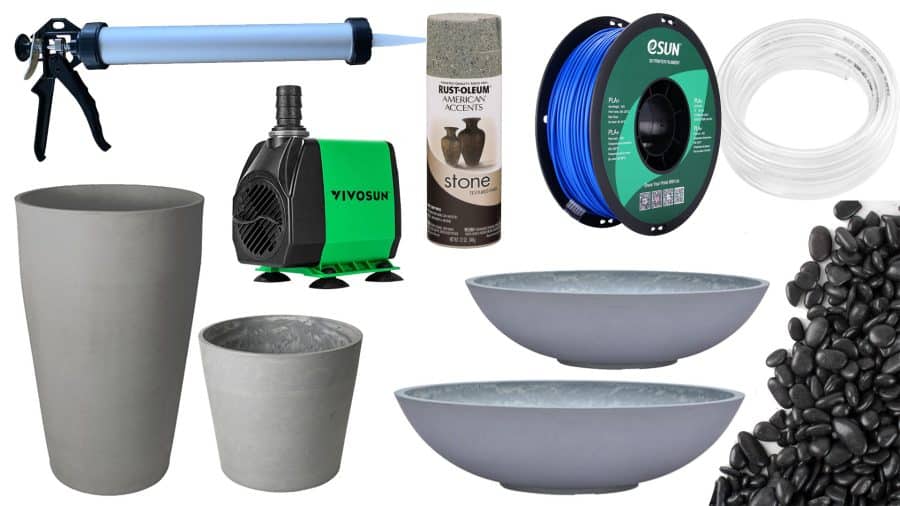
UV Resistant Filament: If you don’t wish to paint the model you will need to 3D print Blastoise in UV resistant filament such as ASA, ABS or PETG. Avoid PLA, overtime it will lose it’s color and shape when exposed to sunlight. Use code KA3DP for 10% off eSUN filament.
Planter Pots: I used lightweight outdoor plant pots to form the fountain. I bought two tapered low bowl planters (700 and 600mm wide), a tall pot for the base (550mm) and shorter one to connect the bowls together.
Water Pump: A crucial component that will circulate water through the fountain. Consider pump’s flow rate and whether it can handle the height and volume of water you plan for your fountain. I used the Vivosun 3000L/H water pump I bought from Amazon which was just enough to reach the height of 1200mm with a nice flow.
Tubes: You will need some kind of tubing or hose to channel water from the pump to Blastoise’s cannons. I used 13mm diameter clear vinyl tubing.
Silicone: This will be used to waterproof the joints and seal any areas where water could leak. It’s also useful for attaching parts of your fountain securely.
Additional Supplies to Consider: Paint, 3-way coupler, water control valve, UV-resistant varnish and aquarium pebbles.
3D Printing Blastoise
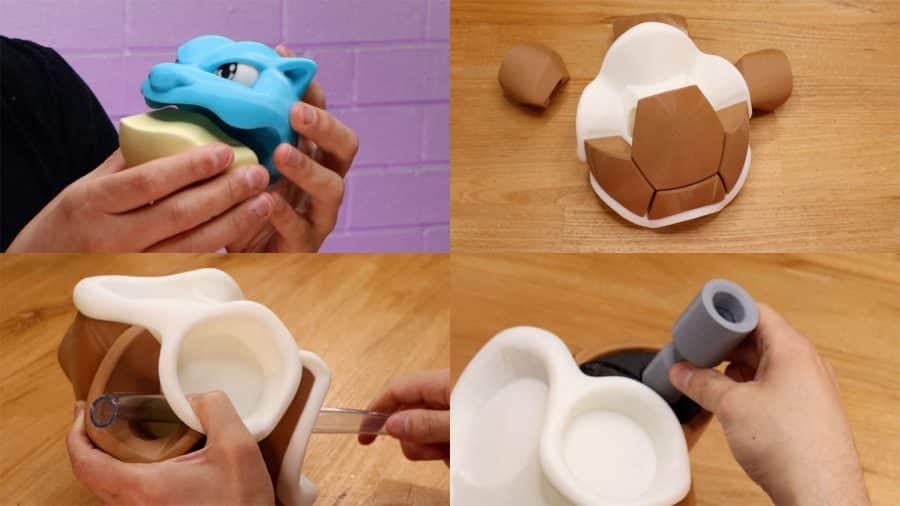
I utilized my Prusa MK4, a recent acquisition, for printing this model. The model found on Thingiverse is conveniently segmented into multiple parts to facilitate printing. I made minor modifications to some of the 3D models, creating pathways for 13mm tubing to run from the feet and up into Blastoise’s cannons.
It’s important to note that if you choose not to paint the model, selecting a UV-resistant filament like ASA, ABS, or PETG is advisable. This prevents color fading or material degradation when exposed to sunlight. Alternatively, applying a coat of UV-resistant varnish over other filament types can also provide sufficient protection.
Preparing the Tubing
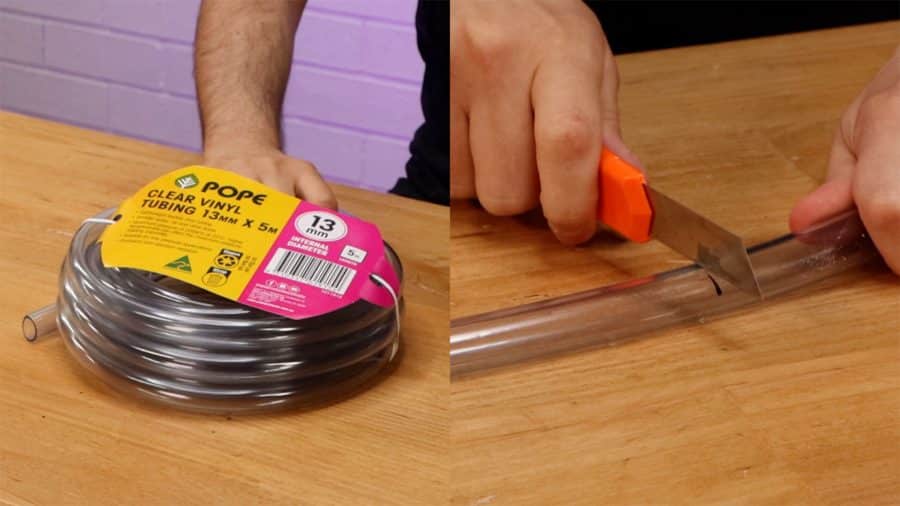
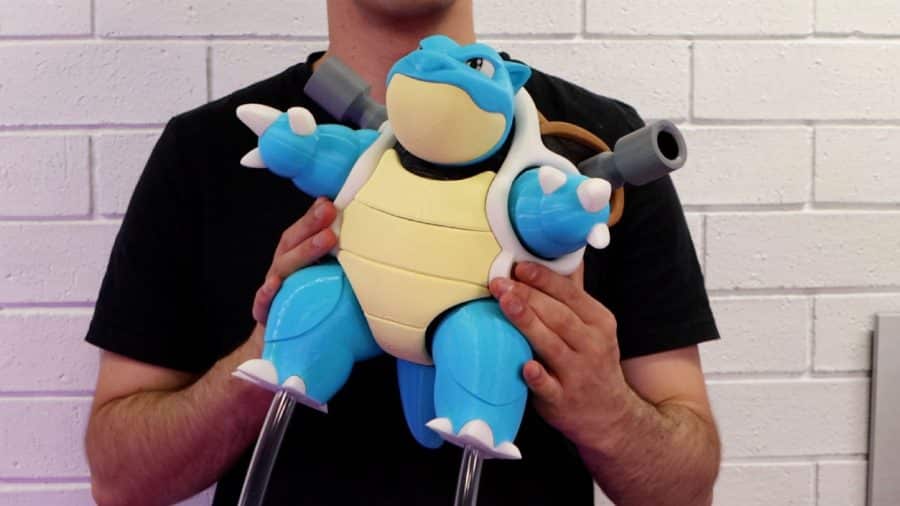
You will need a lengthy section of tubing running from the filter to the middle pot, where it splits into two separate paths. These paths thread through Blastoise and lead up to its cannons. It’s wise to cut a bit more tubing than you initially think is necessary during the assembly of the 3D print. Secure the tubing ends inside the cannons with silicone to ensure they remain fixed in place. For optimal water flow, it’s best to trim the tubing to the precise length during the final stages of assembling the top. This minimizes excessive bends and ensures a smoother flow of water.
Preparing the Planter Pots
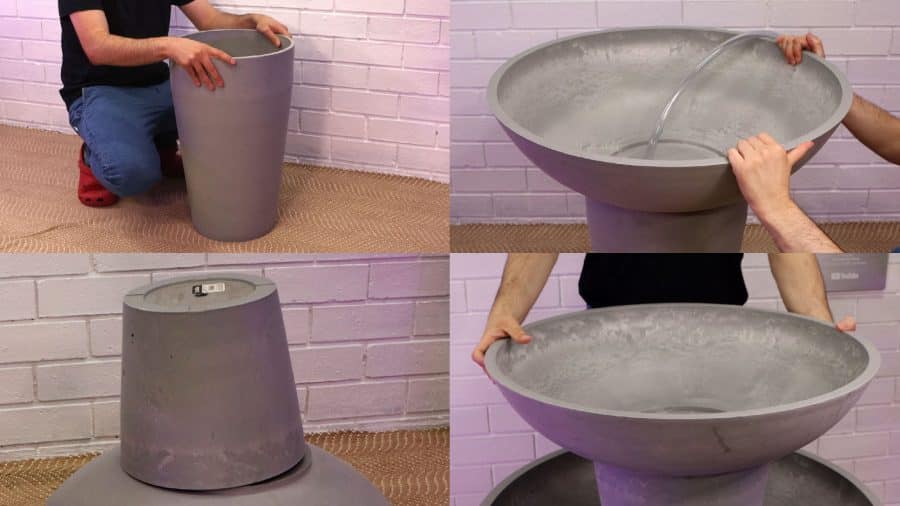
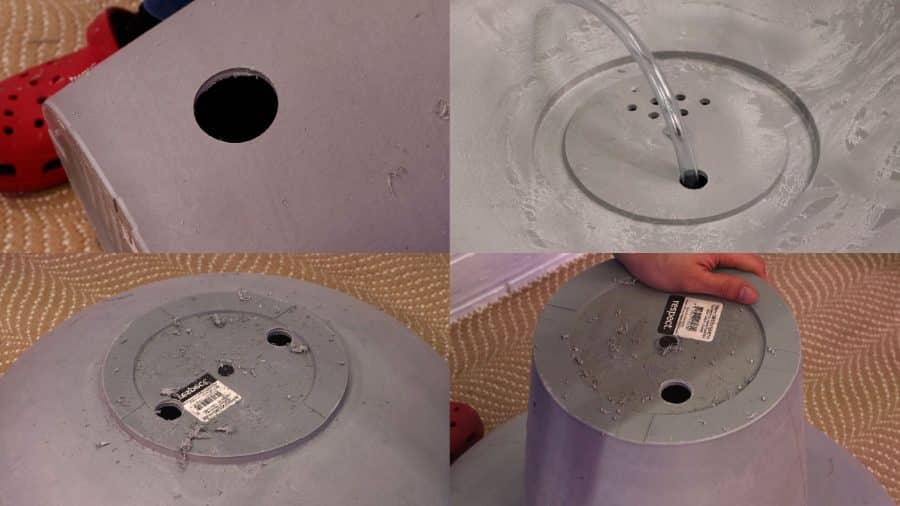
Carefully drill holes in each pot, ensuring they are tailored to fit the tubing which will facilitate the water flow. In the lower bowl, drill additional holes to ensure a smooth transition of water into the bottom filter housing. After drilling, it’s important to take a moment to smooth out and clean any rough edges. This helps prevent debris from being drawn into the pump later on.
Water Pump Installation
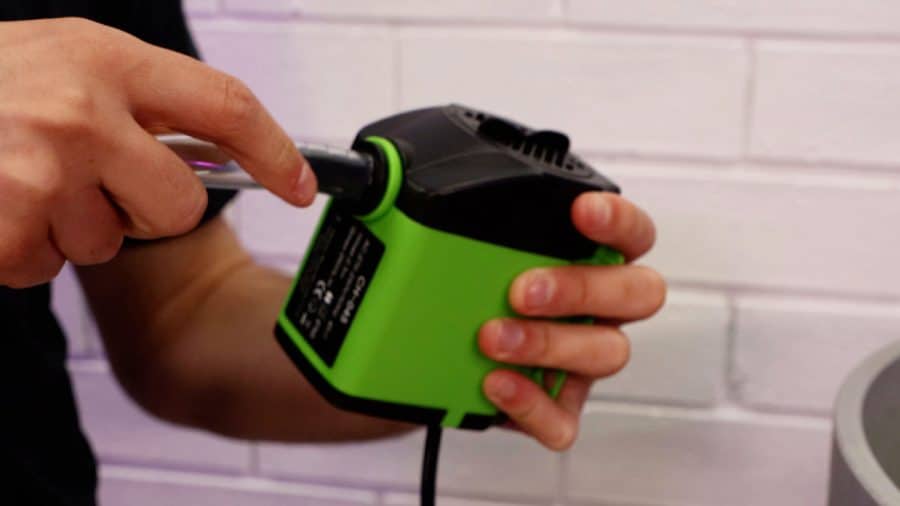
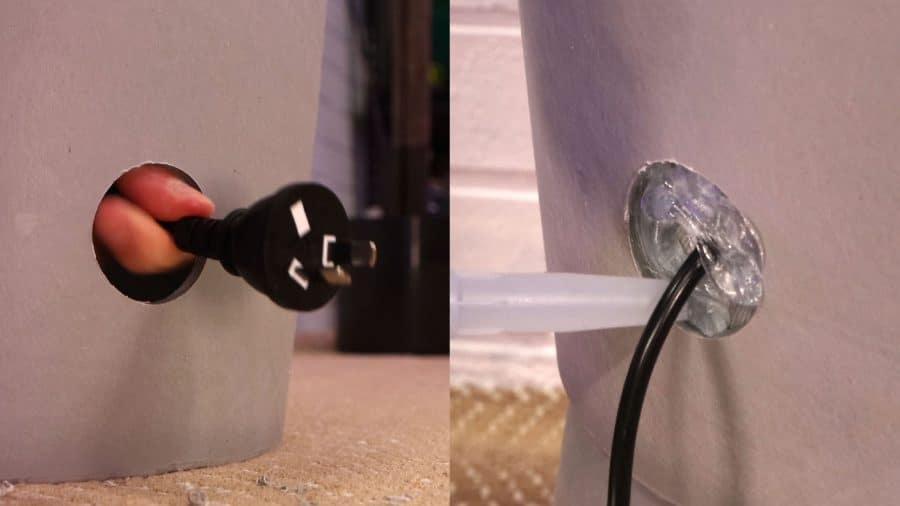
To install the water pump, you will need an additional hole in the bottom pot for the pump’s power cable, making sure it’s wide enough for the plug. Thread the cable through this hole, then apply silicone around it to create a waterproof seal. Place the pump inside the pot, aligning it with the fountain’s tubing, and allow the silicone to dry while the cable remains in place.
Fixing the Fountain Together
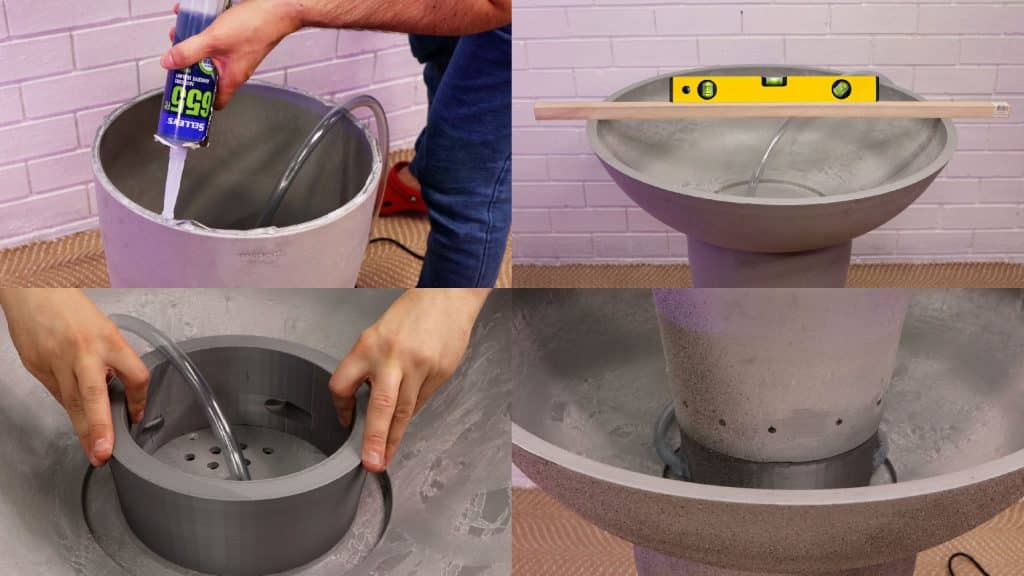
Certainly, you have the option to 3D print the pots if you’re willing to invest the time to divide them into printable sections and then assemble them. However, I opted for a more straightforward approach by purchasing some lightweight pots from a local garden and hardware store. The central, shorter pot wasn’t as tall as I would have liked, so I ended up 3D printing a base to increase its height. This additional base also provided me with the opportunity to create extra holes, which were perfect for routing the filter tube through for the valve installation. Make sure any pots you silicone together are level before they dry.
Valve & Coupler Connection
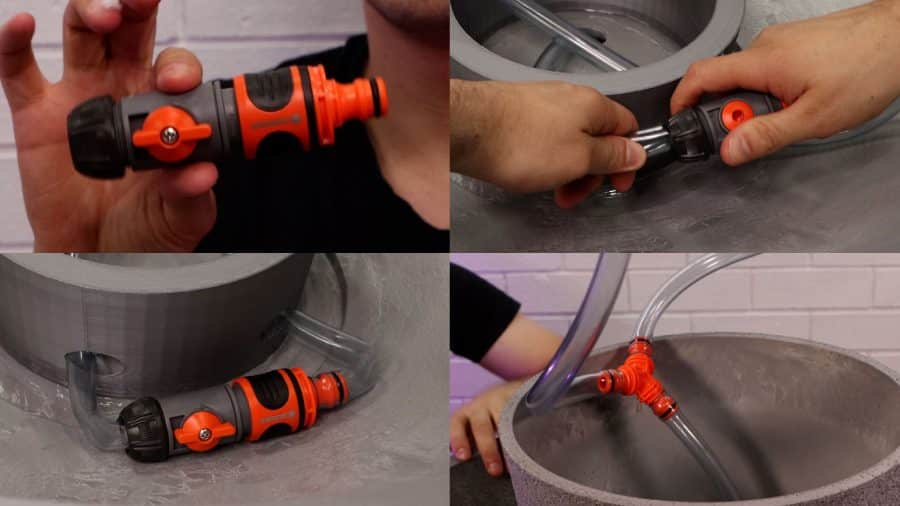
In the construction of the water fountain, the valve and coupler connection plays a pivotal role in managing the water flow. The valve, strategically positioned, allows for fine-tuning the water pressure, and the coupler splits the water flow to both ends of Blastoise’s cannons. You can reinforce the tubes with corrugated conduit to ensure they don’t have any tight bends.
Painting & Blastoise's Rock
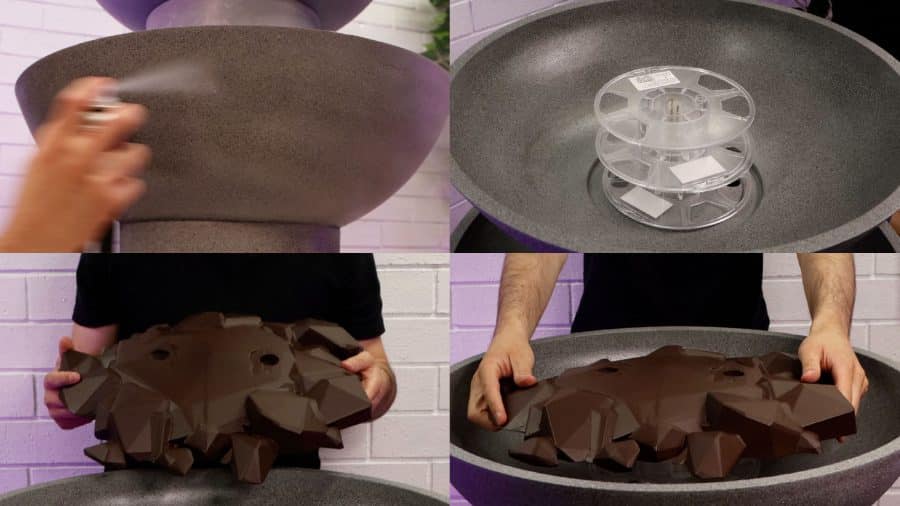
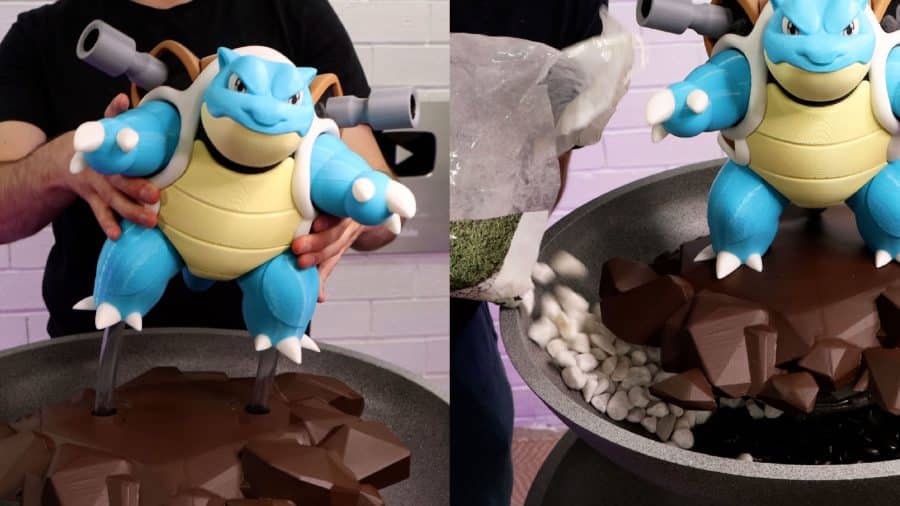
For painting the fountain, I selected a grey granite spray paint to give it a natural, stone-like appearance. After applying the grey granite paint, I added several layers of clear matte spray paint to protect it from the flow of water.
I selected a 3D model of a rock as an ideal location for Blastoise to be positioned. I modified an existing model by adding holes and grooves to accommodate his feet. Blastoise’s weight was enough for him to remain stable without the need for glue, allowing for future modifications if necessary. I elevated the platform above the maximum water level using empty filament spools. It’s important to seal the holes around the tubes with silicone after positioning the model to avoid leaks, as the design intends for the water in the top bowl to overflow the sides.
Filling the Fountain
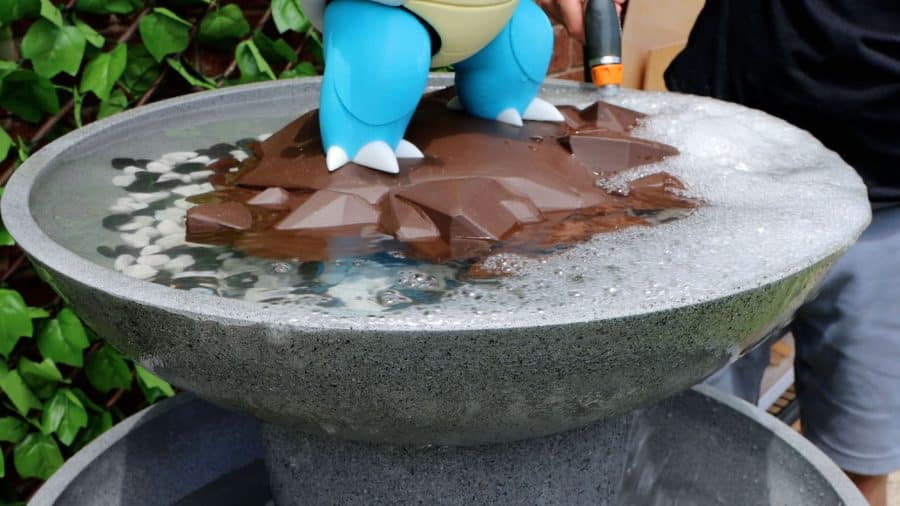
Begin the testing process by filling the top bowl and checking for any leaks. While a minor leak might not significantly impact the fountain’s operation during use, it could pose a problem when the fountain is full and not running. I decided against sealing the top bowl with silicone to allow for future adjustments. Fortunately, the weight of the pebbles and water helps to keep it securely in place. Additionally, I slightly tilted the bowl forward to enhance the waterfall effect, creating a more visually appealing cascade of overflowing water.
Turning on the Water Fountain
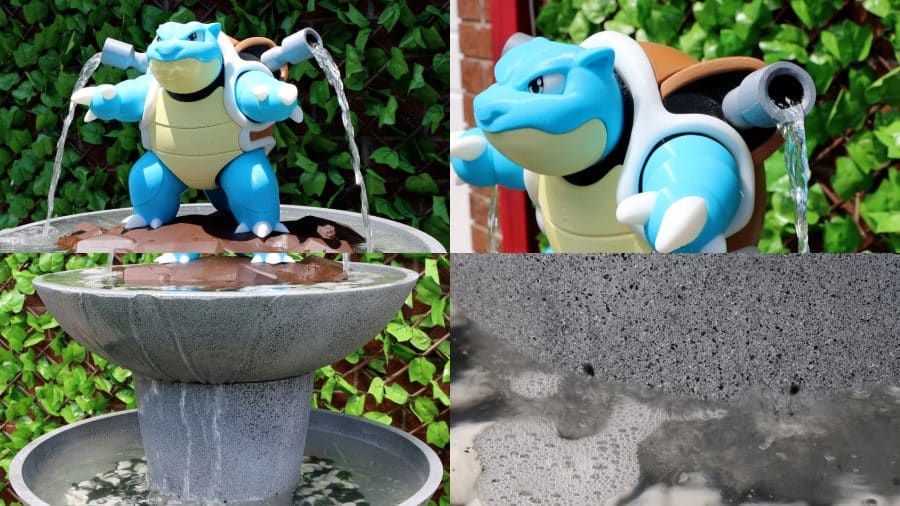
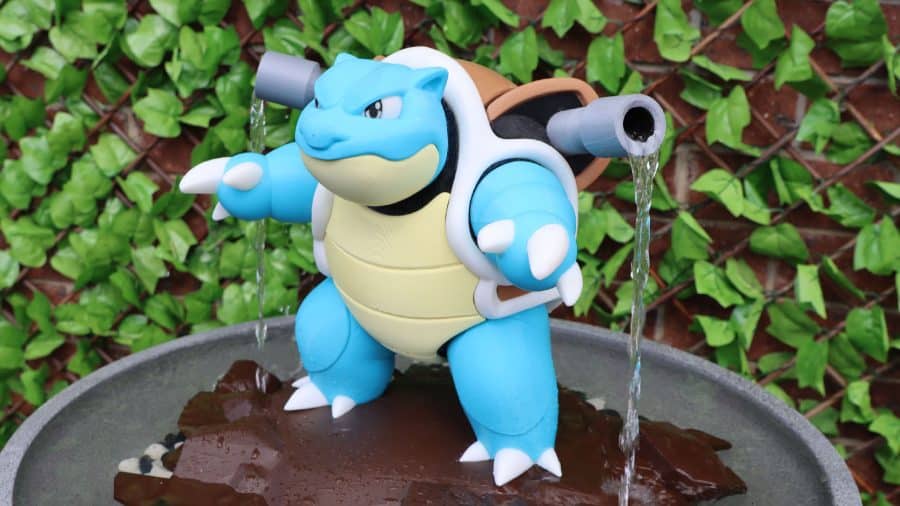
Now, it’s time to bring your new Pokemon water fountain to life! If the water pressure is too low or too high, gently adjust the valve until you find the perfect balance. This may require a bit of tweaking to ensure that water doesn’t splash out of the fountain. Once you have it set correctly, you’ll witness your creation spring to life, with water cascading gracefully and embodying the essence of this iconic Pokemon in a mesmerizing display.
If you found this project enjoyable and informative, don’t forget to subscribe to my YouTube channel and follow me on various social media platforms. I’m gearing up for larger-scale projects in the future, so there’s a lot more exciting content on the way. Stay tuned for these upcoming adventures in DIY and 3D printing!
This article includes affiliate links. Purchases made through these links may provide us with a commission. We appreciate your support.
30 Shelves & Home Storage Ideas
30 Best 3D Printed Shelves and Home Storage Ideas Why 3D Printed Storage Solutions Are Perfect for Every Home When considering innovative and customizable solutions
30 Ways to Recycle Filament Spools
30 Creative Ways to Reuse Empty Filament Spools for 2025 How to Turn Empty Filament Spools into Useful & Fun Creations In the world of
Top 30 Fun SpongeBob 3D Prints
30 Best SpongeBob 3D Prints and STL Files for 2025 Bring Bikini Bottom to Life with 3D Printing! SpongeBob SquarePants has been a beloved cartoon
50 Useful 3D Prints for Your Home
Top 50 Must-Have 3D Prints for Your Home in 2025 How 3D Printing Can Improve Your Home & Daily Life 3D printing has revolutionized home
